T: Tutorial
Version 3.0 (12 December 2019)
by Robert K. Paulsen and Odd Einar Haugen
T.1 Introduction
This is a tutorial for the transcription of a text from a facsimile of the primary source (or the source itself) to a valid XML file according to the Menota standard.
The tutorial outlines two ways of performing the transcription – either T.2 Directly in an XML editor or by way of a T.3 Simplified interface & conversion to XML. Whichever way should lead to a valid XML file. The next step, which is common to both approaches, is making the XML file readable, i.e. T.4 Displaying the text with the help of an XSLT stylesheet.
In either case, an XML editor needs to be installed. We recommend using Oxygen, which works on a number of platforms, and which can be downloaded free of charge for a 30 day test period: Oxygen XML Editor.
Furthermore, a font with a wide selection of characters will be useful. Depending on the primary source and the level of encoding, an ordinary font (such as Times or Arial) can be sufficient. However, for a wider selection of characters, we suggest looking into the fonts available on the MUFI web site. Several of these can be downloaded free of charge: Medieval Unicode Font Initiative.
For those who would like to transcribe the text in a simplified interface, it is necessary to use a Perl script in order to convert the simplified transcription into Menotic XML. Perl should already by installed on the Mac and Unix/Linux platforms, but on Windows it needs to be installed separately: Perl Download.
Finally, it will be helpful to have a skeleton XML file to work with, as well as a suitable facsimile for the transcription. We offer both in the Samples.
T.2 Transcribing directly in an XML editor
This can be done simply by copying an existing, valid XML file from the archive, preferably one of the shorter files. After having corrected the header where necessary, the transcription can be done directly in an XML editor. This is straightforward, but one should be careful not to be overwhelmed by the verbosity of XML. It is recommended to save the file frequently in case it becomes invalid. In some cases, it can be difficult to spot the mistake, so it may be quicker to revert to an earlier, valid version of the file.
T.3 Simplified transcription & conversion to XML
This is the transcription procedure developed by Robert K. Paulsen in Bergen. In this tutorial, the procedure is demonstrated based on a diplomatic transcription of the text, but it can be extended to cover a facsimile level transcription, too.
T.3.1 Simplified transcription
Begin the transcription by opening the skeleton XML file called etf.xml from Samples S.4. As you might have guessed, the file name means “empty transcription file”. However, when saving this file, you should give it a more descriptive name. If you have been using the facsimile from the Old Norwegian Homily Book (AM 619 4to), f. 57v, offered in the Samples page, you might call it AM-619-4to-57v.xml.
When transcribing on the diplomatic level, follow these simple rules:
1. Whether you are using the skeleton XML file or not, remember to have your whole transcription within this structure: <div> <p>...</p> </div>. There may be more than one <div> within the overarching <div>, and of course more than one <p> within each <div>. There may also be a <head> in each <div>, preceding all <p> elements.
2. Begin by entering the leaf/page/colum/line number for the text, delimited by colons. Leaf numbers should be given as :1r:, :1v:, :2r:, etc. Sometimes a manuscript has been paginated rather than foliated, in which case page numbers should be given as :1p:, :2p:, :3p:, etc. Column numbers (if there are more than one column) are given as :A: and :B: (etc.) Line numbers are simply given as :1:, :2:, :3:, etc. A manuscript reference like leaf 17r, column A, line 9 would then be :17r: :A: :9: (with or without spaces, new lines or the like in between). Note that there should always be white space after a linebreak, except for the case described in section 5 below
3. Transcribe words on a diplomatic level, as defined in the Menota handbook ch. 4.2. Use the space bar (or any amount of or kind of white space) between each graphic word in the text.
3.1. Two or more graphic words representing a single lexical word should be connected by a single underline. Decide on a dictionary as a norm. Example: “veiði kona” should be transcribed as “veiði_kona”, and will thus be regarded as an example of the lexical word “veiðikona” f.
3.2. One graphic word representing two or more lexical words should be divided by a single plus character. Example: “alandi” should be transcribed as “a+landi”, and will thus be regarded as an example of “á” prep. + “landi” (dative of land n.).
4. Abbreviations should be expanded and inserted in round brackets, e.g. “h(ann)”.
5. Lexical words across a linebreak should be transcribed with the line number at the break and no spaces on either side of the line number, e.g. “kon:5:ungr”.
5.1. If there is a hyphen in the manuscript, add this to the word, e.g. “kon-:5:ungr”
5.2 If there is no hyphen, simply transcribe the word without a hypen, e.g. “kon:5:ungr”.
T.3.2 Conversion to XML
After having transcribed the text (or part of it) as explained above, you can use the menotaBlitzS script to convert your simplified transcription to a full XML file according to the Menota standard. Download the script from the Samples page.
1. Installing Perl – or checking that you already have it on your computer
In order to run menotaBlitzS, you need to have a Perl interpreter installed on your computer. If you are using Microsoft Windows, we recommend Strawberry Perl. If you are using Mac OS or Unix/Linux, a Perl interpreter should already be installed on your computer. To check if you already have a Perl interpreter on your computer, open the Command prompt (the Terminal on Mac OS), enter perl -v and press the return key. If you get something like the screen in Ill. A, you are good to go:
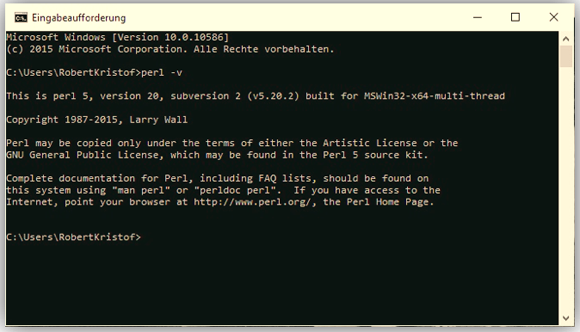
Ill. A.1. Perl is installed on your Windows computer.
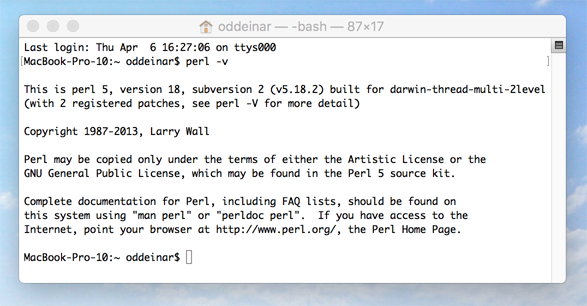
Ill. A.2. Perl is installed on your Mac computer.
The actual converter script menotaBlitzS.plx and the empty transcription file which you will use as a template to write your transcription, are available for download on the Menota website. Make sure you save both of them in the same folder!
2. Running menotaBlitzS
Once you have written your transcription according to the guidelines described on the Menota website, you can use menotaBlitzS to convert the transcription to valid Menota XML. In order to do so, you have to call the program from the Command prompt (Windows) or Terminal (Mac), as shown in ill. B:

Ill. B.1. Opening the Command prompt window on a Windows computer.
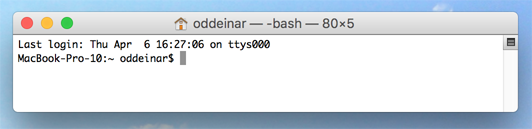
Ill. B.2. Opening the Terminal window on a Mac computer.
2.1. Open the command prompt (Windows) or Terminal (Mac). It should look something like ill. B above. On the Mac, you can locate the Terminal application by using Spotlight.
2.2. You will have to manually access the directory (folder) in which you have saved the menotaBlitzS.plx script and your transcription file. You move through the directories by typing in cd (for change directory), a space and then the path to your target directory. Then you hit the return key, and voilà, you are in the designated directory.
Let us assume your transcription and the menotaBlitzS.plx script are saved in a folder called Transkripsjoner, which is contained in a folder Prosjekt, which is located on drive O:\ (on a Windows computer) or on the desktop (on a Mac).
On a Windows computer you enter cd O:/Prosjekt/Transkripsjoner, while on a Mac you enter cd desktop, hit the return, enter cd Prosjekt on the next line, hit the return once more, and enter cd Transkripsjoner, as shown in ill. C below.
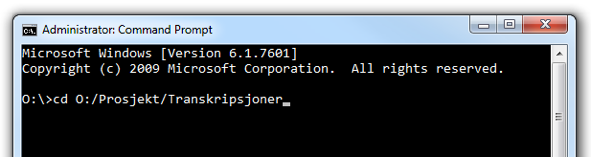
Ill. C.1. Locating the folder with the menotaBlitzS program on a Windows computer.
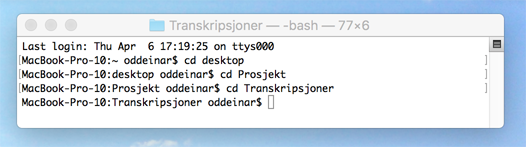
Ill. C.2. Locating the folder with the menotaBlitzS program on a Mac computer.
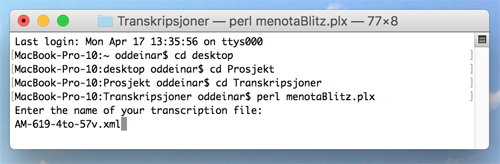
2.3. Now that you have successfully opened the directory, you can run the program. To do so, you simply hit enter, type perl menotaBlitzS.plx, as shown in ill. D, and press the return key once more. Please note that in the illustration, the programme is called “menotaBlitz.plx”, but the correct name is “menotaBlitzS.plx”.
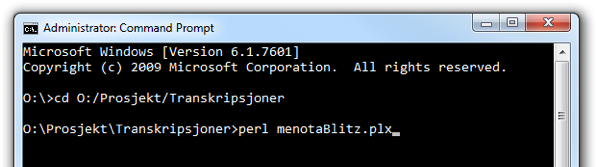
Ill. D.1. Running the menotaBlitzS program on a Windows computer.
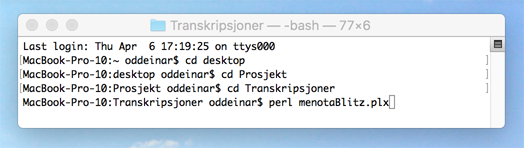
Ill. D.2. Running the menotaBlitzS program on a Mac computer.
2.4. The program will ask you to type in the name of your transcription file, including its file extension .xml. As suggested in T 3.1 above, you might have called it AM-619-4to-57v.xml.
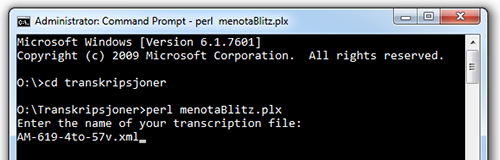
Ill. E.1. Specifying the file name on a Windows computer.
Ill. E.2. Specifying the file name on a Mac computer.
2.5. Specify the file name as shown in ill. E, and press the return key again.
2.6. Now the program runs. This might take a few seconds.
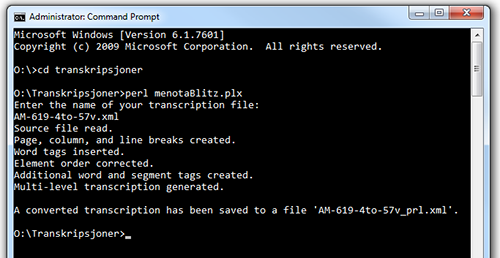
Ill. F.1. Announcing the result of the Perl conversion on a Windows computer.
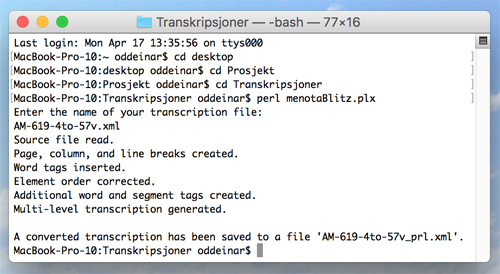
Ill. F.2. Announcing the result of the Perl conversion on a Mac computer.
2.7. When the program is done, it will inform you that it has created a new file containing your transcription converted to valid Menota XML, as shown in ill. F. You will find it in the same folder that contains your transcription file and the Perl script. Assuming you have used the file name AM-619-4to-57v.xml, the converted file will be called AM-619-4to-57v_prl.xml.
Congratulations!
T.4 Making the XML readable: Using an XSLT stylesheet
The final step towards a readable transcription is to use an XSLT stylesheet, so that the XML file can be converted to an HTML file. After this conversion, your file will be easily readable in any browser. This procedure is described in detail in app. F.3 so it need not be re-iterated here.
T.5 Encoding a Medieval Nordic text
The following PDF tutorial has been made for students not familiar with Medieval Nordic manuscripts. Fortunately, many of these manuscripts are eminently readable, and even with a limited understanding of the text and language itself, it is possible to produce a working transcription. This small tutorial explains the procedure in some detail, using a short legend from the Old Norwegian Homily Book in AM 619 4to as an example:
Note that this tutorial is a somewhat large file (11 MB), so it might be downloaded to your computer, not displayed in a new window.